_edited.png)
_edited.png)
_edited_edited.png)

Altenew Educator Certification Program, Level 2 Final Challenge
- Kim Darling
- 7 days ago
- 9 min read

For my Level 2 Final Challenge, the assignment was to:
Select 3 components from any Level 1 or Level 2 classes
Create 4 masculine cards with the following themes:
Anniversary
Encouragement
Love/Thinking of You
Birthday
Create an altered/up-cycled item
Although all the courses I have taken have contributed to my final project, my primary
influences came from Let it Shine, Clean and Simple Boutique Cards, and Impressive
Heat Embossing. For masculine cards, I favor a clean and simple look, with clean lines,
subtle textures, metallic shine, and neutral or dark colors. When it comes to shine, I
lean towards the brushed metal/metallic look. Heat embossing also brings in a shine
and texture that is unique to the medium and elevates the card in a distinctive way.
For the theme, I thought of the masculine influences in my life and the interests and
favored things in their lives that would make for interesting cards. The item that piqued
my interest was cigar boxes. I remember as a child, my father had a few boxes that
held little trinkets and keepsakes. The same is true of my husband. Cigar boxes have
intricate designs, yet they are understated at the same time. I thought creating a border
on a card, like those found on a cigar box, would be visually interesting. I did a small
representation of this on the Happy Anniversary card with a detailed, metallic border
paired with a clean and simple center. Staying on the cigar theme, I put together the
Embrace the Journey Ahead card, in which I added a layer of burlap paper and crinkled
brown cardstock. The brown cardstock represents the dried tobacco leaves used to
wrap cigars, and the burlap represents the bags that tobacco leaves are stored in.
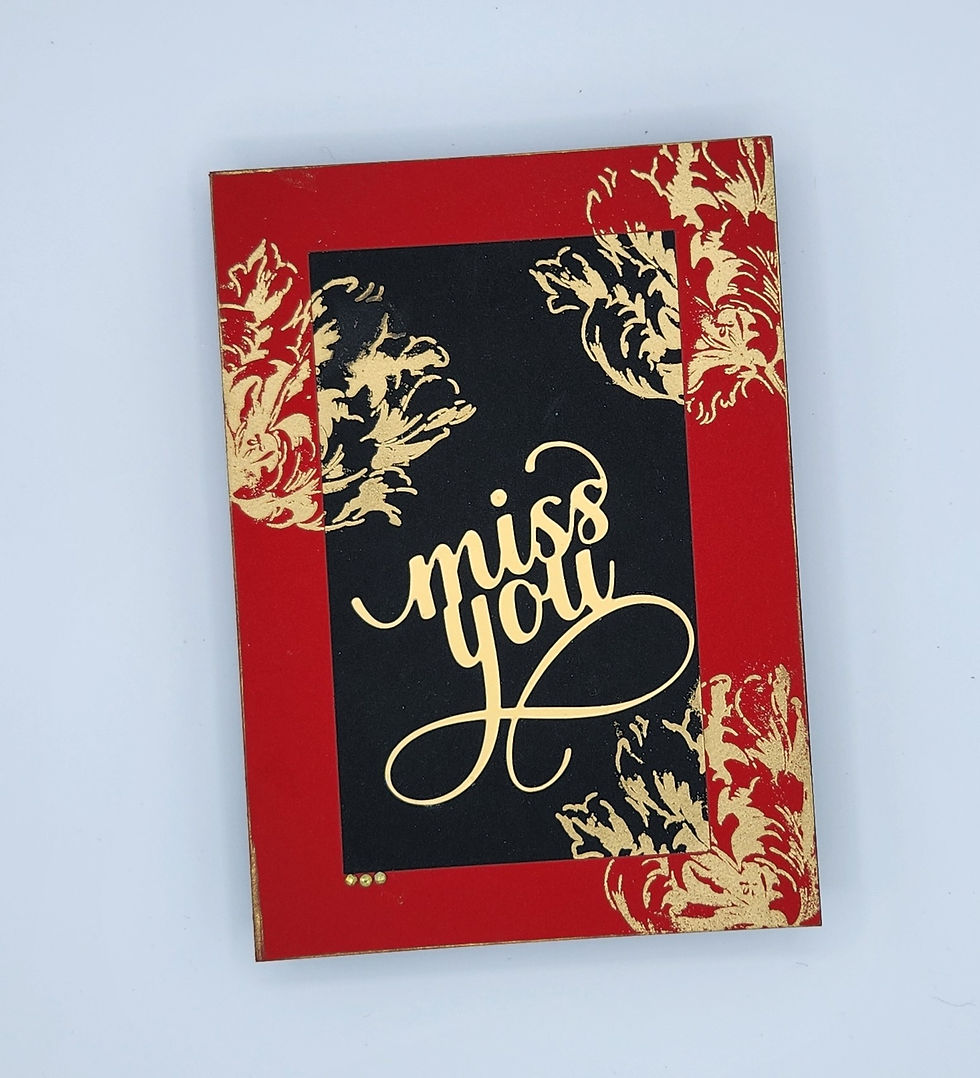
I diverted from the cigar theme for the remainder of the cards. For Thinking of You, I
used the Black Ice embossing technique and brushed silver cardstock to bring in shine
and texture. It reminds me of something you’d find in an auto garage. And for the final
card, Happy Birthday, I pulled back and went down a more subdued path with clean
lines, cool-toned colors, and subtle shine.

For the final piece, an altered/upcycled item, I went back to the Happy Anniversary
theme. My thought was to create a gift item from a wife to her husband on their
anniversary. I used a mix of “masculine” and “feminine” elements. The box itself looks
like an old-fashioned toolbox, and the magnolia flowers add a nice “feminine” touch and
could also represent the flowers used at their wedding.

If you are interested in how to create the cards or the upcycled project, keep reading!
Happy Anniversary
Supplies Needed:
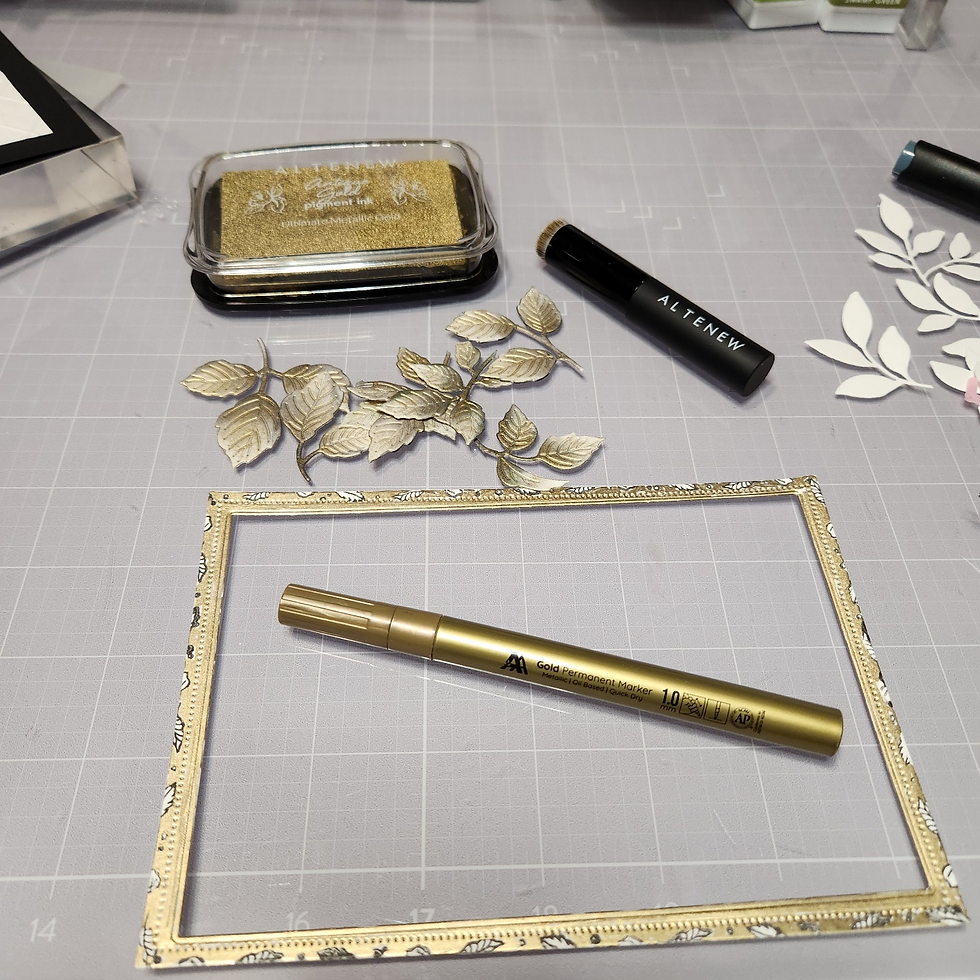
Stamp Sets: Altenew Ambridge Rose, Creative Labels, and Leaf Potpourri
Embossing Folder: Altenew Checkered Diamond 3D Embossing Folder
Die Set: Altenew Prairie Roses Layering Die Set, 5” x 7” Nested Frame Dies
Inks: Altenew Jet Black and Antique Gold Pigment Ink
Pen: Altenew Gold Permanent Marker
Paper: Black 80lbs and White 110lbs Cardstock
Other: Glue, foam tape, stamp platform, stamp block, die machine
Step-by-Step Instructions:
Create Card Base:
o Cut black cardstock to 5” x 7” for your card base.
Prepare Frame and Panel:
o From white cardstock, use the nested frame dies to cut:
One 4 ¾” x 6 ¾” frame
One 4 ¾” x 6 ¾” panel
Emboss Panel:
o Emboss the white panel using the Checkered Diamond 3D embossing folder.
Die Cut Leaves:
o From white cardstock, die cut 8 sets of leaf bundles from the Prairie Roses Layering Die set.
Ink Leaves:
o Lightly shade the bottom and one outside edge of each leaf with Jet Black ink using a blending brush (do not cover the entire leaf).
o Once dry, apply a light coat of Antique Gold pigment ink to all leaves. Set aside to dry.
Create Sentiment Label:
o On white cardstock, stamp one of the label frames from the Creative Labels set using Antique Gold pigment ink.
o In the center, stamp “Happy Anniversary” from the Ambridge Rose set with Jet Black ink.
o Once the pigment ink is dry, die-cut the label with the coordinating die.
Decorate Frame:
o With Jet Black ink, stamp block and the floral stamp from Leaf Potpourri, stamp the outer edge of the frame with leaf impressions, leaving the inner edge blank (so only the outer border has leaves).
o Color the entire frame with the Gold Permanent Marker, except for the leaves (leave those white).
Assemble the Card:
o Adhere the white embossed panel to the black card base.
o Attach the decorated frame to the white embossed panel.

o Using foam tape, adhere the sentiment label to the center of the white panel. Using glue, arrange and adhere the die-cut leaf clusters on either side of the label, slightly tucking the stems under the label.


Embrace the Journey Ahead
Supplies Needed
Stamp Set: Blossoms of Encouragement
Inks: Altenew Embossing Ink, Altenew Ginger Root, Staz-On Black Ink
Cardstock: Kraft, Burlap, Brown, Pearlized Cream
Other: Altenew Antique Gold Embossing Powder, deckle cutter, glue, foam tape,
stamp platform, masking paper or Post-it note.
Step-by-Step Instructions
Cutting the Cardstock
o Use the deckle cutter for all pieces to give a textured edge.
o Cut the following:
Kraft cardstock: 5” x 7” (card base)
Burlap paper: 4 ¾” x 6 ¾” (panel)
Brown cardstock: 4 ½” x 6 ½” (panel)
Pearlized cream cardstock: 4 ¼” x 6 ½” (panel)
Stamping and Embossing the Floral Image
o Place the floral stamp from the Blossoms of Encouragement set in the center of the pearlized cream panel using a stamp platform.
o Mask the center (2 ½” x 1 ½”) with masking paper or a Post-it note to reserve space for your sentiment.
o Stamp the floral image with embossing ink.
o Sprinkle with Antique Gold Embossing Powder and heat emboss. Let it cool.
Adding Texture
o Ball up the brown cardstock, then flatten it out. This adds a distressed, textured look.
Inking the Card Base
o Use Ginger Root ink to color the outer edge of the Kraft card base for a soft, blended border.

Stamping the Sentiment
o Remove the masking paper from the pearlized cream panel.
o Stamp your sentiment in the reserved center area using Staz-On black ink.
Assembling the Card
o Adhere the burlap panel to the Kraft card base.

o Layer the textured brown cardstock on top of the burlap panel.
o Use foam tape to attach the pearlized cream panel (with the stamped floral and sentiment) to the brown cardstock for dimension.


Thinking of You
Materials Needed
Cardstock: Dark Grey 80-100 lbs, Altenew Brushed Silver, Black
Stamp Sets: Altenew Billowing Peonies and Bewitching Rose
Ink: Staz-On Black and Altenew Embossing Ink
Other: Altenew Clear and Antique Silver Embossing Powder, stamping platform
Card Base & Panels
Create the Card Base
o Cut a 5” x 7” card base from dark grey cardstock.
Brushed Silver Panels
o Cut three panels from Brushed Silver cardstock:
4 ¾” x 6 ¾”
4 ¼” x 6 ¼”
4 ¼” x 1 ¼”
Black Cardstock Panels
o Cut three panels from black cardstock:
4 ½” x 6 ½”
4 ¾” x 1 ½”
3 ½” x ¾”
Assembly
Layer the Panels
o Adhere the 4 ¾” x 6 ¾” Brushed Silver panel to the dark grey card base.
o Adhere the 4 ½” x 6 ½” black panel on top of the Brushed Silver panel.
o Set aside.
Sentiment Label
Emboss the Sentiment
o Emboss “Thinking of You” using Antique Silver embossing powder on the 3 ½” x ¾” black panel.
o Allow it to cool/dry.
Build the Sentiment Label
o Adhere the 4 ¼” x 1 ¼” black panel to the 4 ¾” x 1 ½” brushed silver panel.
o Adhere the embossed black panel to the brushed silver panel.
o Set aside.
.
Black Ice Technique Steps
1. Stamp the Floral Image
o Insert the 4 ¼” x 6 ¼” Altenew Brushed Silver panel into the stamp platform.
o Using Staz-On Black ink, stamp the large floral image from the Altenew Billowing Peonies stamp set onto the panel.

Heat Set the Ink
o Use a heat tool to set the Staz-On ink so it’s completely dry before moving to the next step.
Create the Black Ice Effect
o Lightly drag the Staz-On Black ink pad down the embossed panel, starting at the top and pulling straight down to the bottom. Do this across the entire panel.

o Rotate the panel 180 degrees and repeat, dragging the ink pad from the new top (original bottom) down again. Do this across the entire panel.
o This should leave a build-up of ink at both the top and bottom edges, with streaks running vertically down the card.

Heat Set Again
o Use your heat tool to set the ink.
Add Embossing for Shine
o Using embossing ink, repeat the same dragging and rotating process as above.
o Sprinkle clear embossing powder over the panel, tap off the excess, and heat emboss the powder.
Final Assembly
o Adhere the finished, embossed Brushed Silver panel to the corresponding black cardstock panel.
o Attach the sentiment label (previously created and embossed) to the embossed panel, positioning it between the flowers, centered horizontally but slightly off-center vertically.


Happy Birthday Card
Supplies Needed
Cardstock: Dark Blue, Grey, and White
Stamp Sets: Altenew Creative Labels and Happy Sentiments Stamp Sets
Inks: Altenew Embossing Ink, Delicata Silvery Shimmer Pigment Ink
Other: White Embossing Powder, stamping platform, glue, stamp block
Instructions
Prepare Cardstock Panels:

Cut dark blue cardstock to create:
A 5” x 7” card base
A 4 ¼” x 6 ¼” card panel
Cut grey cardstock to 4 ¾” x 6 ¾”
Cut white cardstock to 4 ½” x 6 ½”
Layer the Panels:
o Adhere the grey panel to the dark blue card base.
o Adhere the white panel to the grey panel.
o Set aside.
Decorate the Blue Panel:
o In the center of the dark blue panel, emboss the circle stamp from the Creative Labels set.

o Once dry, emboss the 'Happy Birthday' sentiment from the Happy Sentiments set in the center of the circle.
Create Watermark & Shimmer Effects:
o Using the small leaf stamp from Creative Labels and embossing ink, randomly stamp around the embossed circle on the blue panel to create a watermark effect; fill the entire space around the embossed circle.

o Heat set the embossing ink.
o Stamp again with the small leaf stamp, this time using Delicata Silvery Shimmer Pigment Ink. Offset the stamp so it’s not directly over the watermarked image— overlap is fine, as you want both effects visible; fill the entire space around the embossed circle.
o Heat-set the pigment ink.
Final Assembly:
o Adhere the decorated blue panel to the white panel.


Gift Box-Upcycled Project
Supplies Needed
Material:
o Wood container with handle, as shown in photos, or you can substitute with a standard 4-sided box
Die Sets:
o Altenew Magnificent Magnolia Stencil and Layering Die Set
o Altenew Just Leaves Die Set
Altenew Inks:
o Lavender Fields Fresh Dye Ink
o Deep Iris Fresh Dye Ink
o Citronella Fresh Dye Ink
o Permanent Black Pigment Ink
o Antique Gold Pigment Ink
Cardstock:
o Altenew Soft Lilac
o White cardstock, 110 lbs
Altenew Artist Markers:
o Matcha Tea
o Oak Moss
o Parrot
o Olive
Other:
o 1 ½” white burlap wired ribbon
o Small stapler
o Glue
o Altenew Smoky Quartz Shimmer Relief Paste
o Preserved Reindeer Moss
o Antique Bronze Filigree Charm Pendant
o Gold acrylic paint
o Altenew Gold Permanent Marker
o Tool N One with leaf veining tool or an awl (optional)
o Altenew #5 Detail Blending Brush
o Altenew Mini Blending Brush
Step-by-Step Instructions
Paint the Box
o Use gold acrylic paint to cover the entire wood box, inside and out.
o Let it dry thoroughly.


o With a blending brush, lightly apply Permanent Black Pigment Ink to the outside. This tones down the gold for an aged effect.
o Heat set the ink, then wipe off any excess with a cloth.
Stencil the Branch
o Select a branch stencil from the Magnificent Magnolia set.
o On the side of the box, use Smoky Quartz Shimmer Relief Paste to stencil your chosen branch.
o Allow the paste to dry completely.
Create Magnolias
o Die cut 13 magnolias from white cardstock and 10 from Soft Lilac cardstock.
o Cut all flower centers from white cardstock and ink them with Citronella.
o Use a #5 detailed blending brush to color the magnolias:
For white cardstock: Color 4 with Antique Gold, the rest with Lavender Fields.
For Soft Lilac: Color with Deep Iris.
o Ink petals by tracing the debossed lines of the petals, applying more ink at the base and less at the tips.

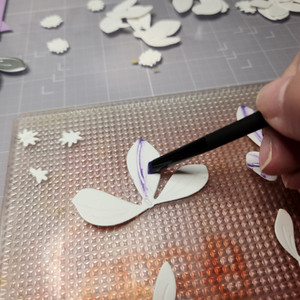


o Assemble the flowers as per package instructions.
Create and Color Leaves
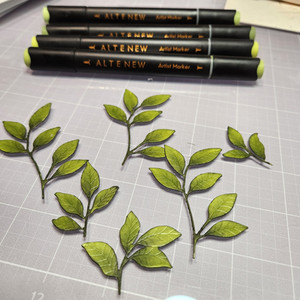
o Die cut 27 clusters of leaves using the Just Leaves Die set.
o Optional: Add veins to leaves. To add the vein detail to the leaves, “draw” the veins into the leaves using the Tool N One or awl. With medium pressure, drag the tool down the center of the leaf, creating the main vein. Then, create the connecting veins by branching off the main vein going from the center out to the side of the leaf. This creates debossed lines on the leaves mimicking a real leaf.

o Color with alcohol markers:
Start with Matcha Tea.
Darken stems, bottoms, and edges with Oak Moss.
Blend Oak Moss with Parrot.
Finish with a light layer of Olive.


Arrange and Adhere
o Once the relief paste is dry, arrange the magnolias and leaf clusters on the side of the box.

o Wrap the arrangement about halfway over the front of the box.
Create and Decorate the Bow
o Make a bow with white burlap ribbon.
o Edge the ribbon with Antique Gold Pigment Ink and let it dry.
o Embellish the bow’s center with a metallic element. I used a Filigree Charm Pendant, colored it with the Gold Permanent Ink pen, and shaped it around the bow’s center.

Final Assembly
o Attach the bow to the top of the box, on the same side as the flowers.
o Place your gift items inside the box and arrange the preserved moss around them to cover the bottom.


Oh Kim! I absolutely adore your classy cards and the upcycled project! You did a fabulous job in your final challenge! LOVE LOVE LOVE!!