_edited.png)
_edited.png)
_edited_edited.png)

Altenew Educator Certification Program , Level 2 Class Submission Impressive Heat Embossing
- Kim Darling
- Nov 2, 2025
- 3 min read

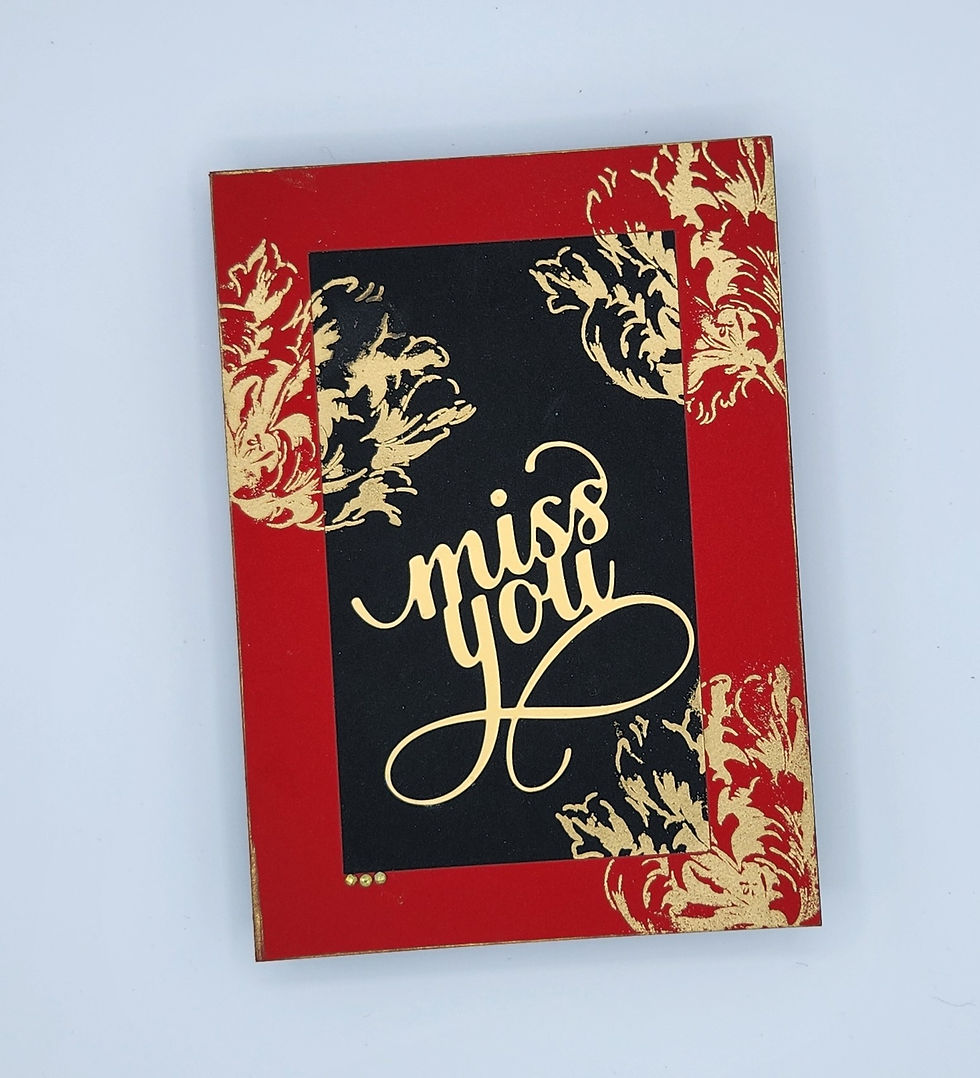
Recipe: Miss you
Ingredients:
Black cardstock, at least 80-100lbs
Red cardstock
Altenew Brushed Gold Cardstock
Altenew Fancy Miss You Die
Embossing Ink
Altenew Antique Gold Embossing Powder
Altenew Parrot Tulips Layering Stamp set
Altenew Antique Gold Pigment Ink
Gold Diamond Dots

Instructions:
From Black Cardstock, create a 5” x 7” card base and a 5 ½” x 3 ¼” card panel. From red
cardstock, cut a 5” x 7” panel. Adhere Red panel to black card base and black panel to the red panel.
With embossing ink and the third layer of the Parrott Tulip stamp (see layering guide), stamp the Tulip around
the card as desired; heat emboss image with Antique Gold Embossing Powder. Die cut sentiment from the
Brushed Gold cardstock and adhere to black panel. Add Gold diamond dots as desired. Ink the outer edge of
the card with Antique Gold Pigment Ink.

Recipe: Love you

Ingredients:
Neenah Classic Crest Cover 100lb, Solar White/White or cardstock of choice
Grey cardstock, 80-100 lbs
Pattern paper of choice
Altenew Simple Frame Mask Stencil
Altenew Serene Blooms Stamp, Stencil & Die Set
Altenew Fresh Dye Inks: Sunkissed, Orange Cream, Autumn Blaze, Firebrick, Mossy Meadow, Green Opal,
Oak Moss, and Jet Black
Altenew Embossing Ink
Altenew Antique Gold Pigment Ink
Altenew Clear and Antique Gold Embossing Powders
Foam Tape

Instructions:
From Grey cardstock, create a 6 ¼” x 4 ½” card base. From white cardstock, cut a 4 ¼” x 5 ½”
panel.
Stencil the Simple Frame Mask in the center of the white card panel using Antique Gold Pigment Ink, set aside
to dry.
On a separate sheet of white cardstock, emboss the large floral from the Serene Blooms Stamp set with clear
embossing powder. Once cooled, use the layering stencil to color the large florals and leaves. Use Sunkissed,
Orange Cream, Autumn Blaze and Firebrick for the florals, transitioning from darkest at the base to lightest at
the end of the petals. Follow the same color blending/transitioning for the leaves using Mossy Meadow, Green
Opal and Oak Moss. Die cut the floral.
Die cut the water pitcher from Serene Blooms from patterned cardstock. Ink the entire pitcher with embossing
ink and emboss with clear and Antique Gold Embossing Powders-for a subtle glitter effect, I mixed roughly a
teaspoon of clear powder, sprinkled in the Antique Gold and mixed the two. Repeat the embossing process
two to three times.
Adhere the stenciled panel onto the grey card base, leaving a strip of grey cardstock open at the bottom for the
sentiment. With Jet Black ink, stamp the sentiment at the center of the grey strip. Arrange the die cut flowers
and pitcher onto the white card panel, mostly within the stenciled frame, allowing some portion of the pitcher,
flowers and leaves to go outside of the framed area. Adhere the floral die cut directly onto the panel. Adhere
the pitcher using foam tape.

Recipe: Just because

Ingredients:
Neenah Classic Crest Cover 100lb, Solar White/White or cardstock of choice
Altenew Hot Press Watercolor Paper
Yellow cardstock
Black cardstock
Altenew Blooming Tulips Layering Stamp Set
Altenew Fresh Dye Inks: Arctic and Caribbean Sky
Altenew Artist Markers: Forest Glades, Evergreen, Butternut, Pumpkin Pie, and Yellow Ochre
Altenew Metallic Watercolors
Altenew Embossing Ink
Altenew Clear Embossing Powder
Instructions:
From white cardstock, create a 5” x 7” card base. From black cardstock, cut a 5” x 7” panel and
adhere to the card base. From yellow cardstock, cut a 4 ¾” x 6 ¾” panel. Paint the ¼” edge of the yellow
panel with gold metallic watercolor, set aside to dry. From watercolor paper, cut a 4 ½” x 6 ½” panel.
Using the embossing ink and clear embossing powder, stamp the watercolor panel with the second layer of the
Tulip(see layering guide), second layer of the stem, and second layer of the leaf of the from Blooming Tulips
Layering Stamp Set. Once cooled, lightly blend the Arctic and Caribbean Sky inks over the entire panel. Color
the center of the Tulip, leaf and stem with the Forest Glades and Evergreen Artist Markers. Use Butternut,
Pumpkin Pie, and Yellow Ochre Artist Markers to color the Tulip. Paint the unembossed portions of Tulip with a
light coat of gold metallic watercolor. Ink the outside edge of the panel with Jet Black ink.
Adhere the yellow cardstock to the card base. Adhere the watercolor panel to the card base. With Jet Black
ink, stamp the sentiment.


LOVE LOVE LOVE