_edited.png)
_edited.png)
_edited_edited.png)

Altenew Educator Certification Program, Celebrations: Stencil Techniques
- Kim Darling
- May 14, 2025
- 3 min read

Recipe: Hello

Ingredients:
Neenah Classic Crest Cover 100lb, Solar White/White or cardstock of choice
Teal 80lbs to 100lbs cardstock
Altenew Stencil Art: Ditsy Flowers Wallpaper Layering Stencil
Altenew Simply Hello Die
Altenew Fresh Dye Inks: Strawberry, Baby Pink, Magenta, Warm Sunshine, Caramel Toffee, Melted
Butterscotch, Mountain Mist, Volcano Lake, Lagoon, Emerald, Mossy Meadow, Green Opal, and Mountain
Pine
Salvaged Patina Embossing Glaze
Embossing Ink

Card Base: From teal cardstock, cut a 4 ¼” x 5 ½” top folding card base. With white cardstock, cut two 4 x 5
¼” panels. Adhere one panel to inside of card base.
Card Front: Stencil the second white card panel with the Ditsy Flowers Wallpaper Layering Stencil, using the
colors noted in the instructions. Adhere the finished panel to the front of the card base.
Sentiment: Cut two “hello” sentiments from white cardstock and adhere together. Using the embossing ink
and powder, heat emboss sentiment, applying 5 coats of powder to create a glossy, enamel-like finish. Once
cooled, adhere the sentiment to the card, just short of halfway down the front of the card.

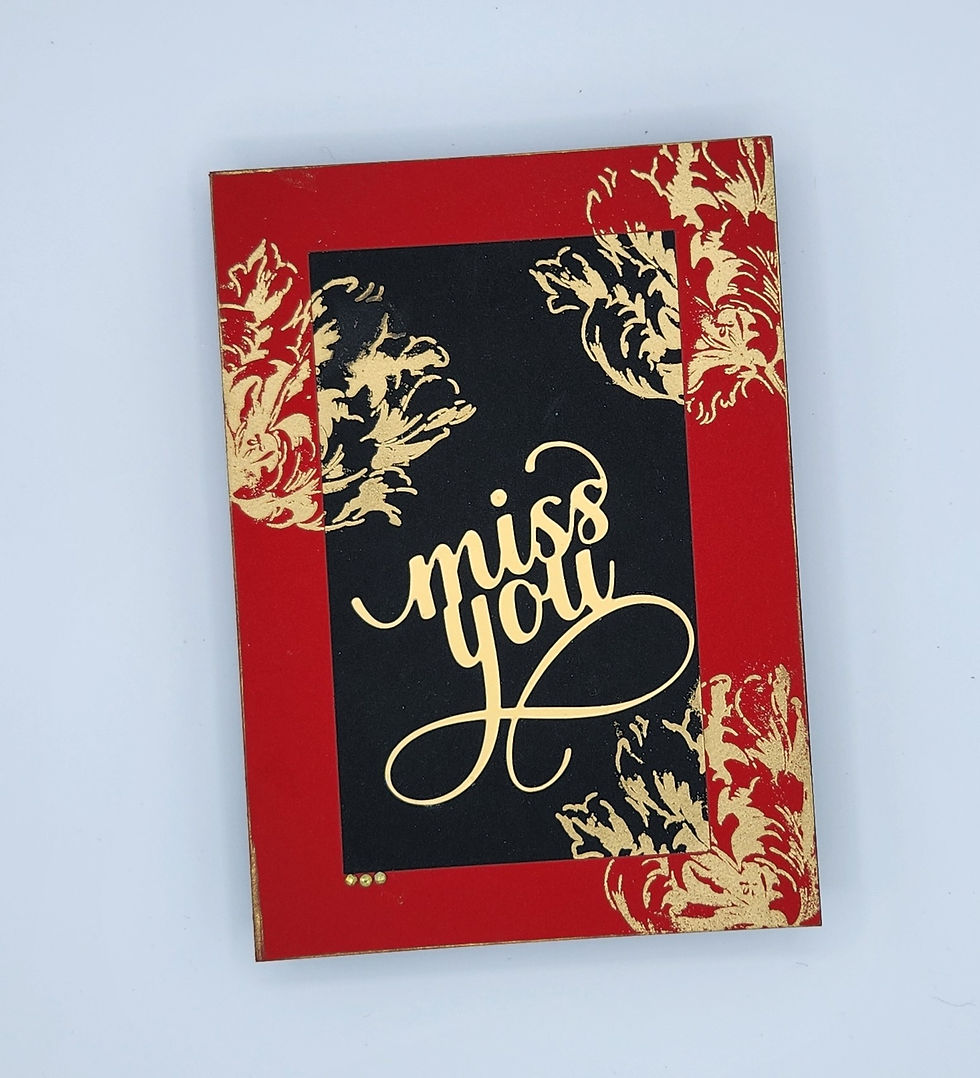
Recipe: Thanks

Ingredients:
Neenah Classic Crest Cover 100lb, Solar White/White or cardstock of choice
Black 80lbs to 100lbs cardstock
Altenew Gilded Rose Layering Stencil Set
Altenew Fancy Thanks Die
Embossing Paste
Altenew Fresh Dye Ink: Magenta

Card Base: From white cardstock, create a 4 ¼” x 5 ½” top folding card base. With black cardstock, cut a 4 x 5
¼” panel and adhere to card base.
Card Front: Cut a 3 ¾” x 5” white cardstock panel. On a glass mat or other crafting surface, combine
embossing paste and Magenta ink, mix thoroughly. In the center of the cardstock panel, position stencil 2 from
the Gilded Rose Layering Stencil Set. Spread the inked embossing paste through the stencil, remove stencil
and let dry thoroughly. Once dry, adhere the panel to the black cardstock.
Sentiment: From black cardstock, die cut two “thanks” sentiments and adhere together, then adhere to the
bottom third of the card front.

Recipe: Never Stop Growing

Ingredients:
Neenah Classic Crest Cover 100lb, Solar White/White or cardstock of choice
Black 80lbs to 100lbs cardstock
Blue 80lbs to 100lbs cardstock
Altenew Thunderstorm Background Stencil
Altenew Mushroom Greetings Outline Stamp Set
Altenew Craft-A-Flower: African Daisy Layering Die Set
Altenew Silver Shimmer Relief Paste
Altenew Fresh Dye Inks: Pink Diamond, Pinkalicious, Rubellite, Razzleberry, Olive, Moss, Warm Sunshine,
Caramel Toffee, Paper Bag, Arctic, and Limestone
Cloud Stencil
Cloud Die
Embossing Ink
Navy Embossing Powder
Foam Tape

Card Base: From blue cardstock, create a 4 ¼” x 5 ½” card base, ink outside edge, about ¼” in, with Arctic ink.
From black cardstock, cut a 4 x 5 ¼” panel and adhere to blue card base.
Card Front: Using white cardstock, cut a 3 ¾” x 5” panel. Stencil panel with the Thunderstorm Background
Stencil and Silver Shimmer Relief Paste. Once dry, ink blend panel, use cloud stencil on the top 1” of the
panel, ink clouds with Limestone and sky with Arctic. Continue the Arctic ink down the panel, with the last 1”
inked in Olive.
Flowers and Leaves: From the African Daisy Layering Die Set, cut one full set of all dies, then two additional
flowers, using only the two top dies for each flower and the flower centers. Ink the first layer of the full flowers
with Razzleberry, the second layer with Rubellite, the third with Pinkalicious and the fourth with Pink Diamond.
The two partial flowers should be inked with the Pinkalicious and Pink Diamond. The flower centers should be
inked with Paper Bag on the first layer, Caramel Toffee on the second layer and Warm Sunshine on the third.
Ink leaves and stems with Olive and use Moss for the shadowed areas. Adhere flower pieces together
according to the instructions, curl the petals on the top two layers of each flower.
Assembly: On the bottom half of the card front, adhere the three full flowers, the stems and the leaves across
the panel. Trim off any part of the die cuts that extend beyond the card front. With foam tape, adhere the two
partial flowers just below the top of the full flowers; use stem and leaf trimmings to fill out the open spaces.
With white cardstock, cut two small and one large cloud. On the large cloud, heat emboss sentiment, “never
stop growing”, from the Mushroom Greetings Outline Stamp Set. On the top third of the card front, adhere the
small clouds directly to the panel. With foam tape, adhere the large, embossed cloud slightly over the two
small clouds.


So gorgeous! LOVE all the cards!