Altenew Educator Certification Program, Level 1 Final Challenge
- Kim Darling
- Jun 24, 2025
- 8 min read
Challenge: Choose 3 courses from Level 1 for inspiration, choose a theme from either Birthday, Graduation or Encouragement, create 4-6 masculine and 4-6 feminine cards, use a recycled element and create gift packaging for the cards; all should be cohesive within each card group and as a whole.
My first thought was texture, and given how everything turned out, I would say my second thought was vintage. In my opinion, whether masculine or feminine, the design is really about the individual you are making the cards for; men can love flowers and women can love fishing. I personally have never been traditionally “feminine” in my tastes or style, though I love a gorgeous flower for sure, I just as equally love metal, stone and plaster. I chose the overall vibe of the cards based on the men in my life, who would be seen as traditionally masculine in their tastes, and for ladies like me, who branch between both “masculine” and “feminine” in our tastes.

The background textures are the focus for each group of
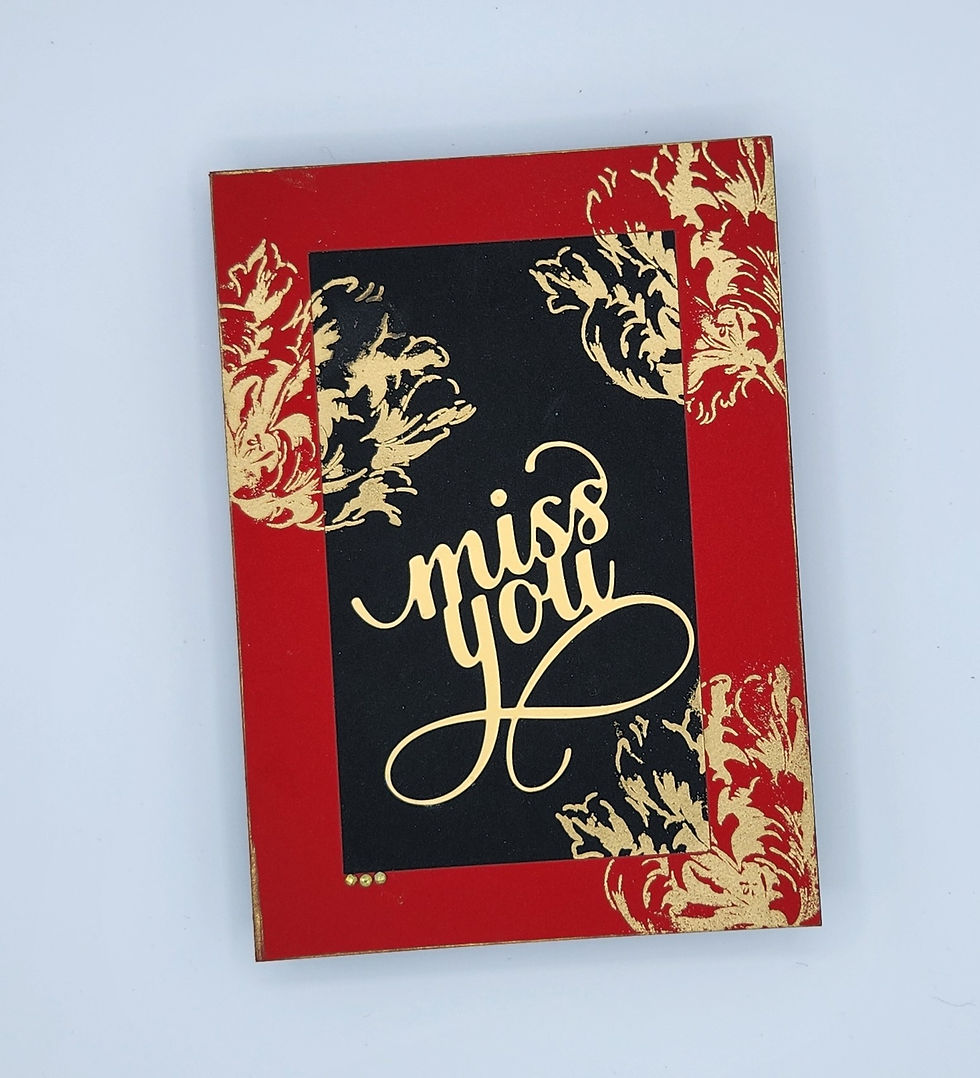
cards. I stuck with earth tones and some soft pink/peach, yellow, orange and teal to round out some of the feminine cards. I used black 100lb cardstock for all of the 5” x 7” card bases and most of the sentiment labels and accents, Antique Gold Embossing powder for all the sentiments, and Antique Gold Pigment Ink for accents and edging around the cards and sentiment labels.
I chose encouragement as the theme for my card sentiments. The class inspiration came from, really all of the courses, as each had interesting and useful techniques, but I can say I
was focused more on Clean & Simple Boutique Cards, Celebrations: Stencil Techniques, and Easy Die Cutting Techniques. Clean and Simple Boutique Cards embraces the simplicity of clean lines and white space. Stencil Techniques shows the diverse, artistic looks one can achieve with ink, paste and a beautifully designed stencil and Easy Die Cutting Techniques shows how dies can level up the look of your card by adding dimension and shape.

Card 1: Every day is a second chance (Craft Your Life Project Kit: Vintage Tapestry)
I love Artist Markers, one of my top five favorites for sure. This card uses the Masonry Wall 3D Embossing folder
colored with a range of gray Artist Markers from the Rock
Collection, Warm Gray and Gentleman’s Gray collections.

I used earth toned 100lb cardstock to die cut leaves from
the Leaf Clusters Die Set and added an accent strip and sentiment label from black cardstock. This was the first card
I created, and the tone and vibe of the card
informed the rest of the collection.
Card 2: When one door closes, another one opens (Flower Arch Outline Stamp Set)
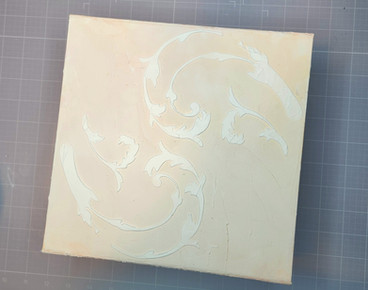
I tried to create a plaster finish using the Altenew Embossing Paste and loved the result. I tinted the embossing paste with Silver Lake and Gray Denim Fresh Dye Inks until I achieved the desired color, then applied a light coat onto 110lb white cardstock.

I used the Sand Dunes Fresh Dye Ink set to blend in
additional color/dimension onto the “plaster” finish. I had some ribbon made from twine and another with writing, that I picked up from the craft store a while back, this was a great opportunity to use them. I layered the ribbon with writing on top of the twine ribbon and adhered it to the dried “plaster”.
I die cut 2 circles, of different sizes, to use for the sentiment labels, the larger one from white cardstock and the smaller from black cardstock. Using white cardstock again I die cut 4 thin tree branches for accents. The branches were colored with Expresso Fresh Dye Ink and the larger circle with Mocha and Espresso; spray the larger colored circle with water and use a paper towel to pick up some of the ink. Put everything together, raising the sentiment labels on foam tape
Card 3: Together we cross every challenge (Bridge to My Heart Silhouette Stamp Set)

I think the Organic Linen 3D Embossing Folder has great texture, after running a white cardstock panel through the die machine, I lightly inked the top and edge of the panel with Espresso Fresh Dye Ink and Antique Gold Pigment Ink to give a roughed-up feel.

Using white cardstock, I die cut leaves from the Leaf Clusters Die Set and colored the leaves with Espresso Fresh Dye Ink. I edged the outside of the card base, the sentiment label and the black cardstock strip accent with Antique Gold Pigment Ink and put everything together, adding foam tape to the strip accent and the sentiment label.

Card 4: You are amazing (Butterfly Dreams Stamp Set)

I definitely wanted to include a brick wall in the textures. I found a slim line brick wall stencil in my stash and tinted the Altenew Embossing Paste with Mahogany Bark and Rhodolite Fresh Dye Inks. For the sides of the brick wall, I went with the plaster look again, I wanted the effect of plaster breaking off of the wall with brick underneath. I followed the same process as with Card 2 above for the plaster and applied it to the sides of the brick. Then, I die cut leaves from green and gold cardstock using the Leaf Essentials and Leaf Clusters Die Sets. I cut labels from the Best Wishes Tags and Creative Labels Die Sets and edged with Antique Gold Pigment Ink, added a piece of screen that I had in my stash, arranged and adhered the leaves, and added the sentiment labels with foam tape.
Feminine Cards
Card 1: Sending hugs (Zero Waste-Leaf Potpourri Outline Stamp Set)

I went back to the “plaster” as the base for this card, following the same process noted in Masculine Card 2. Once dry, I used various rub-ons from my stash for the writing and leaf elements. I used a burlap ribbon, along with a velvet green ribbon, to accent the card; the green ribbon was one I had saved from a Christmas gift basket we received from friends last year.

I cut sentiment labels from green and gold pearlized cardstock and embossed the sentiment on the green cardstock. I raiseed the “plaster” card front and sentiments with foam tape for additional dimension, edging the card front with the Espresso and Antique Gold inks.
Card 2: Wishing you a day filled with love and joy (Plants & Vases Silhouette Stamp Set)

For this card I pulled out the beautiful Garden Rose 3D embossing folder for the background and used colored pencils, in muted tones, for the flowers and leaves, then adhered the panel to the card base with foam tape.

I finished it off with a strip of black cardstock, running vertically across the landscape card, along with a black cardstock sentiment label, embellished with Antique Gold Embossing Powder; both were raised with foam tape for additional dimension.
Card 3: You’re strong, beautiful, capable, & simply Awesome (Craft Your Life Project Kit: Vintage Tapestry)

For this card I pulled out the Bold & Beautiful 3D embossing folder and the Ditsy Flowers Wallpaper stencil. I used Antique Gold Pigment Ink to color the flowers and leaves on the embossing folder and edges all of the layers. For the stencil, I used Buttercream, Warm Sunshine and Forest Glades Mixed Media Inks and softened the colors by adding a very light layer of brown ink-I took my light brown blending brush and lightly went over the panel in order to tone down the colors. I cut three black panels: one long narrow strip, one medium and one small rectangle. And raised the embossed panel with foam tape and applied directly to the card base. I followed that with the narrow strip of black cardstock applied directly to the embossed panel then raised the medium rectangle with foam tape and applied over the strip. I cut a small/medium size piece of the stenciled layer, raise with foam tape and applied to the medium black panel then, for the final layer, I applied the Antique Gold Embossing Powder to the small rectangular panel and adhered on top of the stenciled layer with foam tape.
Card 4: You’re amazing (Cherry Blossoms Bunch Outline Stamp Set)

For the first layer of the card, I used brown pearlized cardstock, edged with Antique Gold Pigment Ink. For the next layer, I lightly blended Peachy Glow and Strawberry Fresh Dye Inks onto a white cardstock panel.

Then, I stenciled the Vintage Motifs Background Stencil with embossing paste; once dry, I lightly brushed the raised areas with Antique Gold Pigment Ink and adhered the panel onto the brown cardstock with foam tape. From scrap cardstock, I die cut several frames with the Sparkled Frame Die Set then, cut one frame from gold cardstock.

I adhered all of scrap pieces together and placed the gold frame on top; once dry, I colored the inner and outer parts of the frame with a gold pigment pen so the stack of frames match from the side view. Next, I die cut two full sets of flowers and leaves from the Parchment Bouquet Layering Die Set. I inked the individual flowers with Buttercream, Warm Sunshine, Caramel Toffee and Paper Bag Mixed Media Inks, the small cluster of flowers with the Mountain Mist and Volcano Fresh Dye Inks, and the leaves with Nature’s Wonders Fresh Dye Ink set. I placed the frame in the center of the card and arrange the flowers and leaves within, and slightly outside of, the frame. I cut and embossed a sentiment label with Antique Gold Embossing Powder, and placed the label under the frame.
Gift Boxes
For the gift boxes, I found white and black paper boxes with magnetic closures. I decorated both boxes relatively the same to one another, but with different color schemes. In keeping with the plaster/texture vibe with the cards, I applied embossing paste to the outside of the boxes (except the bottom). Once the initial coat was dry, I used the Craft Your Life Project Kit: Vintage Tapestry Layering Stencils to create additional texture and dimension to the boxes.

Masculine Gift Box
I coated the outside of the box with black embossing paste; if you don’t have black, use white paste and color with black ink. Once the initial coat was dry, I applied a thick coat of Burnished Platinum Shimmer Relief Paste through stencil 1 from the Vintage Tapestry Layering Stencil, to the upper right and lower left-hand sides of the top of the box-one side must dry completely before applying the other.

Then, on the back of the box, I applied the stencil 2 design from the Vintage Tapestry Layering Stencils.
Once dry, I inserted shaved Aspen wood into box as filler (from local craft store) to pad the bottom of the box and laid the final cards and matching envelopes into the box.
Feminine Gift Box

I coated the outside of the box with white embossing paste and once the initial coat was dry, blended a light coat of Peachy Glow and Strawberry Fresh Dye Inks into the top and sides of the box. I followed the same process for the inside lid of the box. Be light handed with the paste so the box will still be able to close with the magnets.
Once the inks dry, apply a thick coat of white embossing paste through stencil 1 of the Vintage Tapestry Layering Stencil to the upper right and lower left-hand sides of the top of the box-one side must dry completely before applying the other. Then, on the back of the box, I applied the stencil 2 design from the Vintage Tapestry Layering Stencil.
Once dry, I inserted shaved Aspen wood into box as filler (from local craft store) to pad the bottom of the box and laid the final cards and matching envelopes into the box.
_edited.png)
_edited.png)
_edited_edited.png)













WOWZERS!! All your cards look absolutely STUNNING!! LOVE LOVE LOVE the colour palette!! So good.
Love the vintage tone/feel of your cards. The brick background and the masonry wall are my favs. I may need some embossing paste now. Great job on your project!! -Jill K group 56